

What I learned about Drafting and Sewing my own Leggings
- Allison Baker
- Feb 16
- 6 min read
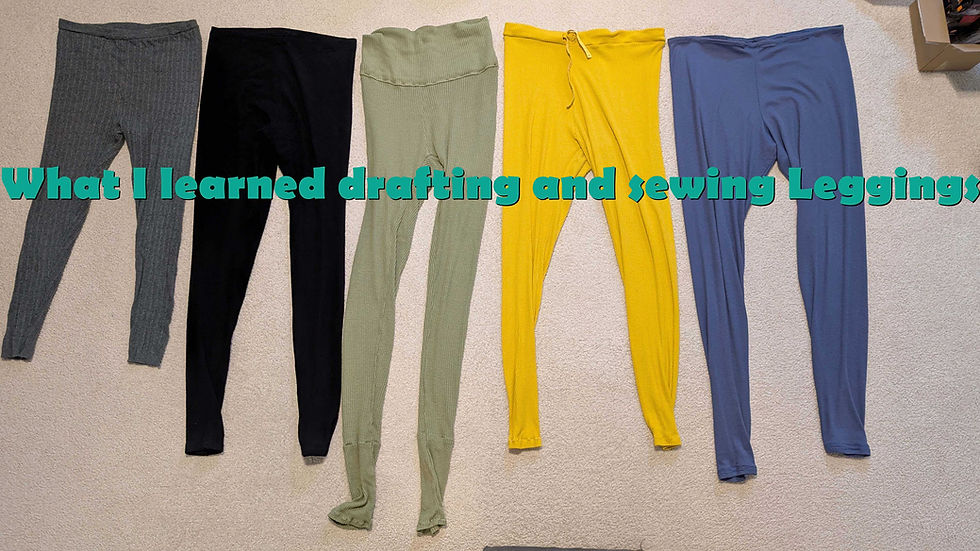
Citizens of the internet I must confess, I am both blessed and cursed with long legs. Sure they make pants in tall sizes and give a few extra inches to cover my shins (if I'm lucky). But I rarely see tall sizes in thrift stores. And I don't think I have ever seen tall sizes for leggings second hand. A few years ago, I actually realized I hate everything about wearing pants! Now I will only wear leggings/ yoga pants (those aren't really pants) if it's cold out.
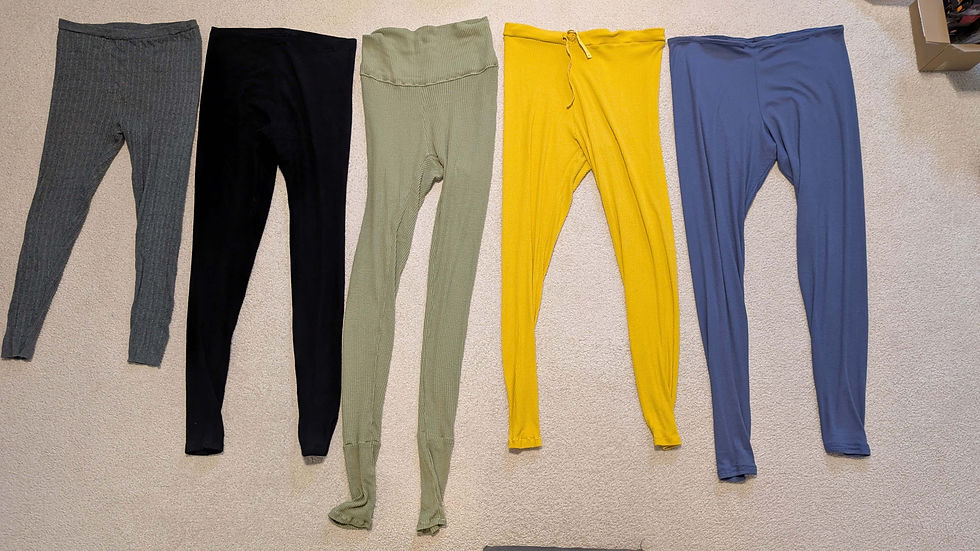
So naturally, the next step for any sewist is to learn to make her own! As of January 2025, I have now made 4 pairs of leggings and drafted 2 patterns over the course of about a year or so. I have learned so much and wanted to share with the internet what worked and what I could have done better! If you're thinking about making your own leggings, you absolutely should! I usually finish mine in an afternoon and find I am way more comfortable in my skin when I have me made leggings on!

1st Pattern
TLDR: Traced from favorite sweater leggings.
I used to wear these gray sweater leggings CONSTANTLY and love how they had extra space in the booty so they wouldn't squeeze too tight. The down side is that they are too short, very wintery, and warm and I need to have leggings I can wear in the office during the frigid summer AC months. To trace, flipped them inside out and put one leg inside the other so I could trace the entire crotch curve onto pattern paper. My only adjustments: added length at hem and waist as I wasn't sure how the fabric/pattern would work. Also added about an inch of seam allowance to give me some alteration room.
What worked: This pattern would work well for making leggings in similar fabrics to the original (IE sweater fabric, with elastic waistband). It does get you a good shape for what legging patterns look like.
What didn't work: Pattern worked well with high recovery, 4 way stretch fabric (1st leggings) BUT overtime there was too much negative ease and it strained the fabric. This caused holes along the crotch seams after about a year of constant wear. Pattern DID NOT WORK for 2 way stretch only (2nd leggings) and caused major fit issues.
2nd Pattern
TLDR: Traced from 1st pattern and adjusted measurements to be true to my measurements.
Since I knew my 1st pattern needed some adjusting and my measurements had changed since drafting it, I knew I needed to go back to the drawing board! I started by tracing the original pattern again. This time, I changed all the measurements of the pattern to match mine before cutting anything out. For example: I measured the width of my upper thigh, and I made sure that the width just under the crotch curve is half that measurement. This means that regardless of the stretch of the fabric I use, there will always be enough fabric and I just need to take in the leggings after I sew them. I also included my current measurements on the pattern so that next time I use it, I will know if I need to make adjustments again.
What worked: General sizing and shape was pretty on point! I didn't need to add extra fabric to make them work.
What didn't work: 3rd leggings were a bit loose at the waist due to having a low recovering so I did add a drawstring. The shape of the waist was a bit funky on this pair too, which I tried adjusting on the pattern by adding more height to the waist curve. 4th leggings ALSO turned out a bit loose at the waist so I added 3/4" elastic. To be fair, I was also in the mood for more relaxed fitting clothing so I'm not all that mad about either of these things being loose!
General con: For these to work, you will need to have a fitting session to shave away extra ease so that they will stay on your body. If you already have a good shaped and sized pattern the amount of fabric you need to remove is pretty minimal. It can just be an annoying extra step.

1st Leggings
Fabric: black rib knit cotton/poly blend
Recovery: Strong
Stretch: 2 way, width wise with some give length wise
Yardage: 2 yards purchased, could have gotten away with 1.5 yards probably
Haberdashery: None
Pattern: 1st pattern traced from a favorite pair of sweater leggings
Machine: Regular sewing machine with zig zag and overlock stitch
Construction: No major issues, just sewed everything up and tried them on inside out to tailor to fit me! Sewed all my test seams with zigzag and final seams with overlock stitch. Waist is just a folded over edge.

Wear and tear: I wore these multiple times a week for nearly a year before the seams at the crotch started to bust due to negative ease + weight gain. I was able to patch them up just fine and they are still really comfy!

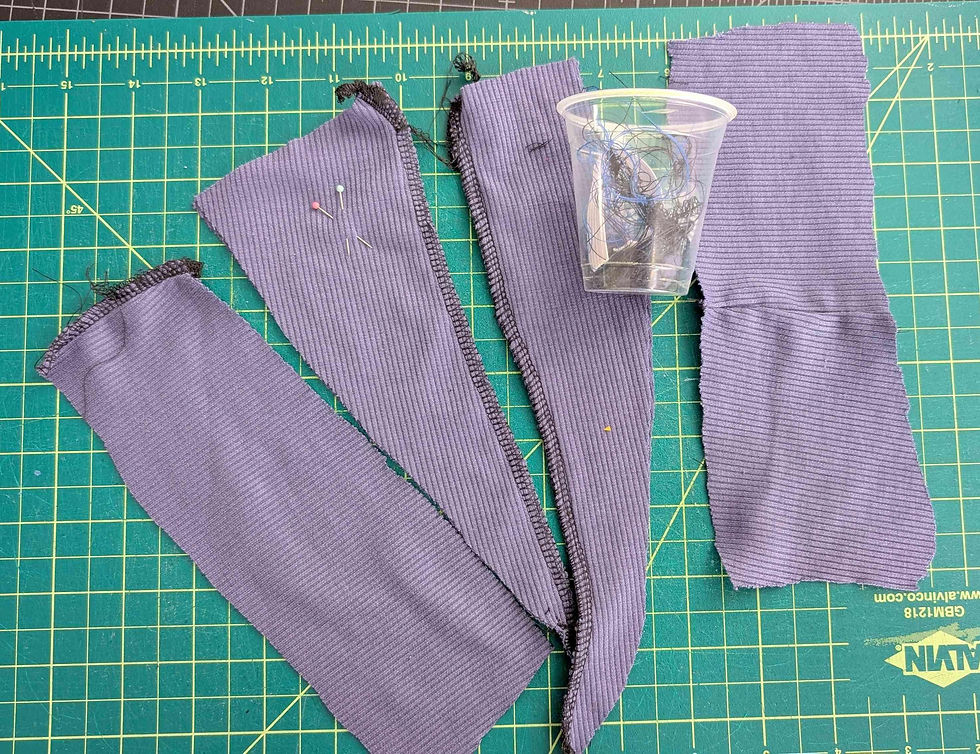
2nd Leggings
Fabric: Green rib knit cotton/poly blend
Recovery: WEAK
Stretch: 2 way, width wise with NO GIVE length wise
Yardage: 2 yards purchased, could have gotten away with 1.5 yards probably
Haberdashery: None
Pattern: 1st pattern traced from a favorite pair of sweater leggings + adjustments to make them work
Machine: Regular sewing machine with zig zag and overlock stitch
Construction: These were such a pain to alter to fit! I needed to add additional fabric to the hems (on top of the already "long" pattern) otherwise the leggings ended at mid shin. I also needed to add a waist band as it ended up sitting a lot lower on my hips than the 1st pair.
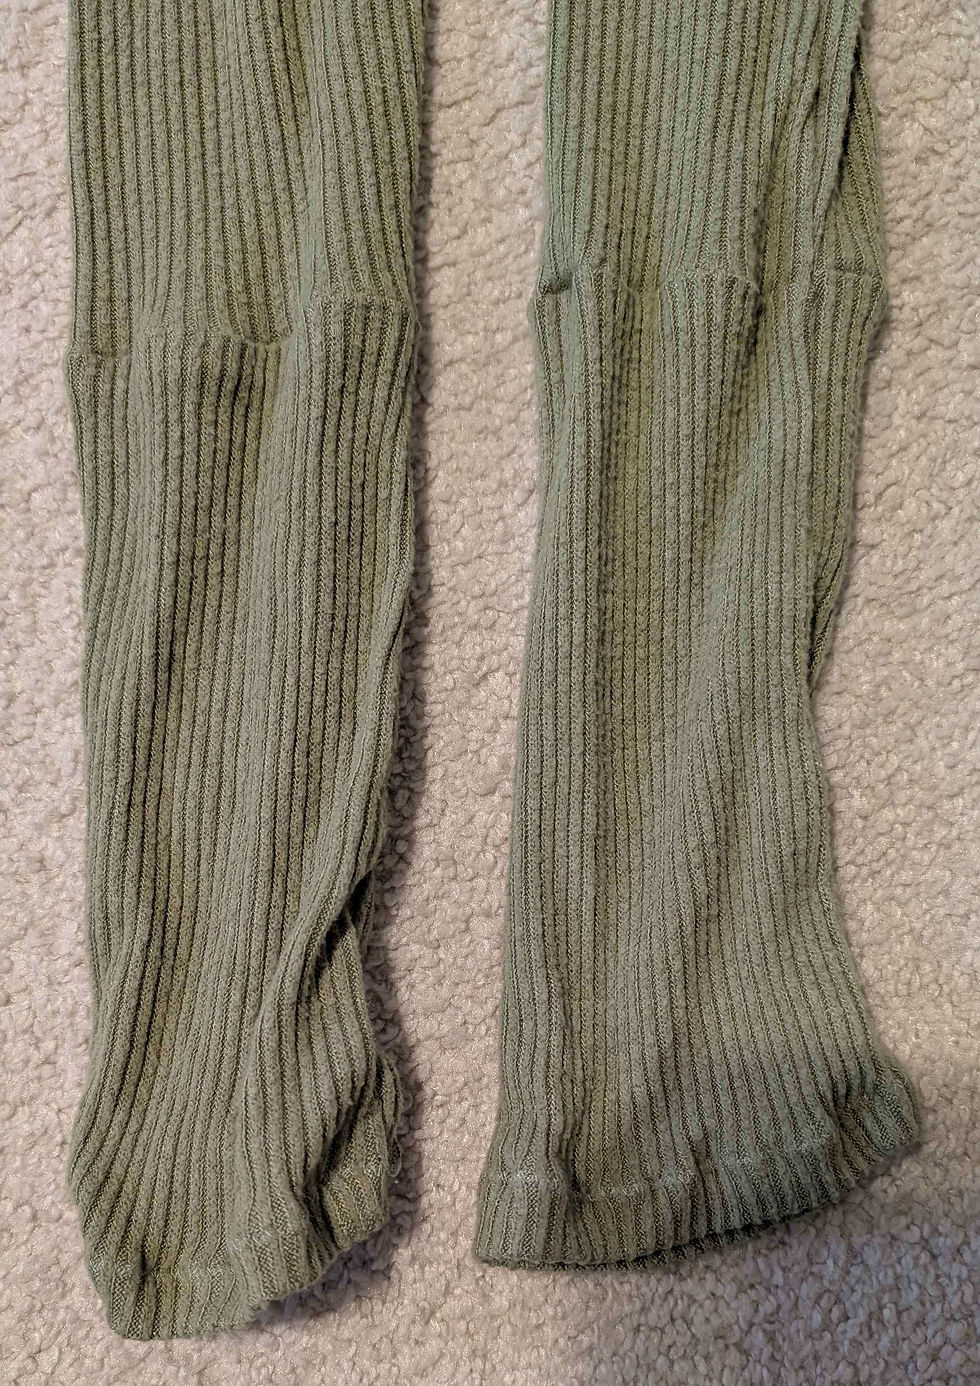

Wear and tear: Honestly I don't wear these unless I'm really CRAVING green leggings to complete a look. Why? Mostly because when I made adjustments to the fit and added additional fabric, it was off grain. So now one leg twists and they are just a bit too snug to want to wear regularly.

3rd Leggings
Fabric: Yellow rib knit cotton/poly blend (different colorway of 2nd leggings)
Recovery: WEAK
Stretch: 2 way, width wise with NO GIVE length wise
Yardage: 2 yards purchased, could have gotten away with 1.5 yards probably
Haberdashery: Bias tape for drawstring
Pattern: 2nd pattern traced from 1st pattern and adjusted to current and true measurements. No negative ease.
Machine: Mostly a serger
Construction: No real issues, but this was my first serger project! So I had a bit of a learning curve there. I turned off the knife function until I was able to do test fitting. Opted to add a drawstring as the waist didn't have enough recovery to stay put. I cut a few holes in my waist band to insert a bias tape drawstring.
Wear and tear: These are super comfy, lounge style leggings! The only downside is that they are not fully opaque and that when I wear a dress over them you can usually see a bump from wear the tie is. As of writing this, they are only a month old so no "tear" to speak of yet but I imagine I will wear them often despite the bright yellow not matching as many things!

4th Leggings
Fabric: Blue rib knit cotton/poly blend (different colorway of 1st leggings)
Recovery: Strong
Stretch: 2 way, width wise with some give length wise
Yardage: 2 yards purchased, could have gotten away with 1.5 yards probably
Haberdashery: 3/4 elastic at waist
Pattern: 2nd pattern traced from 1st pattern and adjusted to current and true measurements. No negative ease.
Machine: Mostly a serger
Construction: Only my 2nd serger project, so I was still (and still am) learning the ropes! I opted to try adding in elastic mostly to learn something new but also because I didn't want them to be super tight. I fudged it up a bit, as I thought I could serge it directly to the fabric and fold it over but it doesn't quite look right. Oh well, it's still functional and its not something anyone else will see!
Wear and tear: These are SO comfortable and feel completely different from the 1st pair of leggings, despite being the same exact fabric. It feels like I'm wearing pajamas at work! I have noticed that they have a tendency to fall down or sit low on my hips depending on the outfit I'm wearing so I may need to adjust the waist at some point. These are less than a month old, so no notes on how they've held up yet!
And that's everything I know about making leggings, so far! Did you learn anything? Can you teach me anything about my mistakes? Let me know in the comments or shoot me a message on Instagram! And don't forget to give me a follow over on Pinterest, Instagram or Facebook to see what else I'm getting into!
コメント