

How to Sew Upcycled Curtains from Old napkins and Tablecloths
- Allison Baker
- May 9, 2023
- 3 min read

Remember that pretty tablecloth and napkin set that my friend gifted me from the 70s-80s? Well the tablecloth cleaned up beautifully and I decided to upcycle it (and the napkins) on display full time as curtains!

My sewing space faces west and gets intensely bright and hot, especially in the summer months. I pretty sensitive so I often can't spend much time in the space once it gets like that even though I already have blinds in the space! I'm hoping these curtains will improve the temperature and light quite a bit! Not to mention, it can be so hard to find curtains that suite a space at a good cost!

Supplies
Large tablecloth or set of napkins
Matching fabric to make hanging tabs
Coordinating fabric to extend length (optional)
Lining fabric (optional)
This is a pretty straight forward project, so I'm going to highlight the most important steps and then tell you what I did. Your project will probably look different based on the challenges your materials bring to the table. Also this is not the *professional* way to sew drapes, its just the practical way I made mine :D
Measure your windows or hold up your fabrics to ensure proper size. If we were following traditional rules of drape making you would aim for 1.5-2x the width of the window so you get a nice fullness when the curtain is closed.
Cut (if too large) or sew together (if working with smaller pieces) to create the front part of curtain.

Finish raw edges (if needed). Mine napkin version didn't but the tablecloth needed a raw edge finished where I cut it in half
Create hanging tabs by sewing a very long rectangle, flipping inside out, cutting down to even lengths and iron each one in half with the raw edges tucked under.
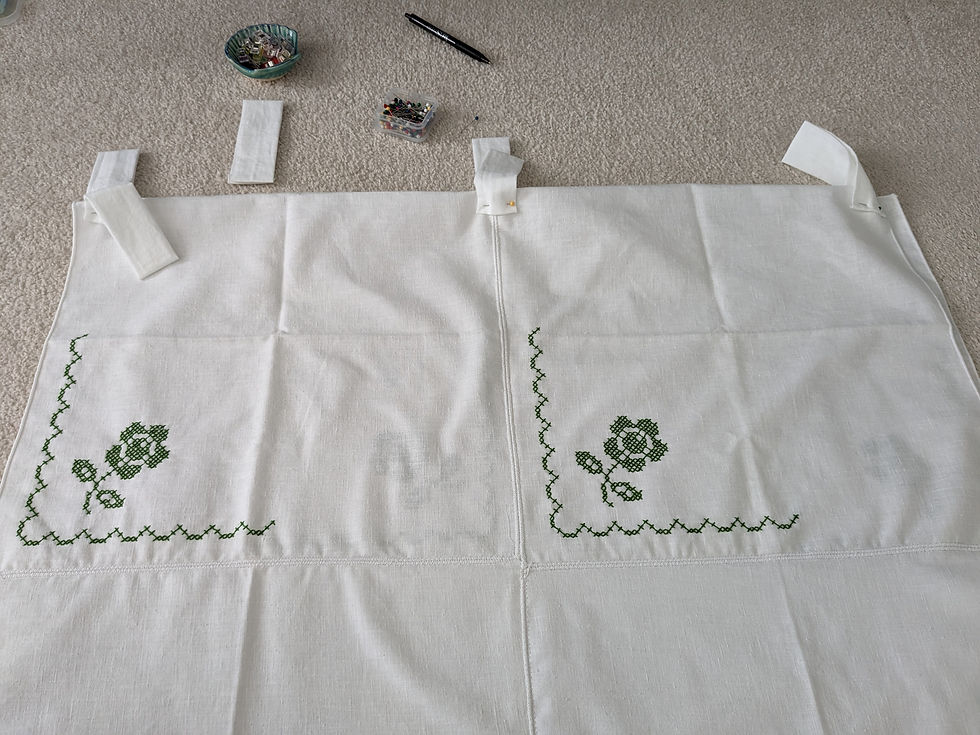
Determine tab placement by measuring or eyeballing and sew on. You might need more than you think to get the look you want, so be prepared to add more after you check how it looks

That's it, you created a window covering!

Extras:
Lining: I took my finished curtain, layered a white bedsheet (so I didn't have to deal with seams) over it, and sewed them right sides together around 3 edges. I chose to leave the top open since it wouldn't be as visible. Flipped it right sides out, Ironed it, rolled the top raw edges to sit nicely behind the top edge and sewed. Now it's lined!
Extending the length: I didn't have enough length from the napkins to reach the bottom of my window so I added more white fabric to the bottom edges. I measured the length I needed, multiplied it by 2 (bc it's doubled up), and added seam allowance.

Cut that measured length, sewed on the back side of my curtain with the nice side of my extension facing the back side and edges matching, folded down to the length I need, and folded back up to meet the front edge of the curtain. At the front, tuck in the raw edge of the extension at the top and sides and iron prior to sewing. PHEW that was a really long explanation, but it was basically the same method as sewing bias tape.

Construction tip: I minimally cut into my linens so that someone in the future could reuse them more easily in the future. Some of my napkins didn't line up perfectly so I just folded them and tucked them to the back.

Hope this gives you some ideas for making your own window coverings as we move into the summer months! If you try this project, I'd love to see! Tag @Sunny_Salvage on Instagram or Facebook and follow me on Pinterest for more upcycling ideas!


Comments